Cookbook
Intro
A collection of small guides on how to implement cusomizations.
Add a custom setting type
IMPORTANT: Since this cookbook entry was written, wf-setting-element was added, which makes this process much easier. Please check that out first.
Add a wf-directive, wf-setting-datetime with the following code:
// in src/App/Bundle/CmsBundle/Resources/wf-directives/wf-setting-datetime.js
let id = 0;

module.exports = (el, { value: settingEl }, moduleConfig) => {
    const { moduleEl } = moduleConfig;
    const div = moduleEl.ownerDocument.createElement("div");

    const inputId = `wf-setting-datetime-${id++}`;
    const name = settingEl.getAttribute("name");

    div.innerHTML = `
        <label class="form-label"
               for="${inputId}"
        >${settingEl.textContent}</label>
        <input class="form-control"
               type="datetime-local"
               id="${inputId}"
               @input="commitSetting($event, '${name}', $event.target.value)"
               :value="settings.${name}" />
    `;

    moduleEl.wfModuleSettings.appendChild(div);
};
Use it:
<div wf-role="poll">
  <wf-setting-datetime name="startDate">Start date</wf-setting-datetime>
  <wf-setting-datetime name="endDate">End date</wf-setting-datetime>
</div>
Adding a custom toolbar button
Note: Each module element toolbar defines four areas where you can add buttons: at the beginning of the toolbar ("start") or at the end ("end"). For each of these, there's a "before" and and "after" area, referring to whether the area is before or after XalokNext's standard buttons. The example below adds a button in the "end" & "after" area.
Add a wf-directive, wf-my-toolbar-button with the following code:
module.exports = (el, { value: settingEl }, moduleConfig) => {
    moduleConfig.moduleEl.wfToolbarEndBeforeButtons.prependButton(
        // a label of the button, it's good to have this event though at the moment it won't show up anywhere :)
        "My toolbar button",
        // the icon CSS class of the button
        "fa-bug",
        // the callback to be invoked when the icon is clicked
        () => {
            $window.wfMyToolbarButton(store, wfRolePath);
        }
    );
}Note: The use of the $window variable in the click handler of the button - this is a global property registered in the Vue application that allows us easy communication from a wf-directive's code to the JS code that should actually handle the click. Note: Inside the handler, you can make references to all the variables shown in the console when clicking the debug button on the module's toolbar (module, moduleConfig, etc.);
Now you need to register and implement the wfMyToolbarButton in the window object. A good place for this is in the admin/wfvue/app_setup directory, here we're using admin/wfvue/app_setup/my-toolbar-button.js:
define([], function () {
    return (app) => {
        window.wfMyToolbarButton = (store, wfRolePath) => {
            console.log("wfMyToolbarButton clicked on module", wfRolePath);
        };
    };
});Note: This is using the (normal) window variable, as opposed to the code of the wf-directive that was using $window. This is because the wf-directive is running at compilation time, it doesn't know about the window where the compiled code is going to run.
Note: You must "enable" this file by requiring it in admin/wfvue/app_setup/index.js:
define(['_wfed/wfvue/app_setup/index'], function(base) {
    return (app) => {
        base(app);

        // REQUIRED HERE:
        IS_CLIENT && require('admin/wfvue/app_setup/my-toolbar-button');
    }
})Note: It's required only when IS_CLIENT is true, since on the server there's no toolbar, this code is not needed for the SSR.
Now you can use that directive: add wf-my-toolbar-button attribute to a DOM element inside a wf-html template. If you want this button to be added to all toolbars, you can extend the wfRole wf-directive.
Handler module events
Note: Imagine that we want to add a list every time we add a button in a module, for this to be able to listen to the events that are launched when we add, delete, update, etc. For this we will use the vuex store, this in addition to listening to events allows us to launch them. let's go with a visual example:
This would be our twig template:
<div
     wf-role="world-more-content"
     wf-new
     class="c-space">
    <h3 wf-module="body_text"
        wf-role="world-more-title"
        wf-new
        wf-toolbar-position="top"
        wf-allow=""
        wf-use-placeholder="true"
        class="c-space__title"></h3>
    <div class="c-space__switch__filters">
        <div class="c-space__switch__filters__nav">
            <button
                wf-module="body_text"
                wf-role="world-more-subitem-title"
                wf-new
                wf-toolbar-position="top"
                wf-allow="+-"
                type="button"
                class="c-space__switch__filters__nav__item"
                @click="$window.changeAppTab(store, moduleRef, false)">
            </button>
        </div>
    </div>
    <div class="c-space__switch__content">
        <div
            wf-module="wfed/dynamic/listing"
            wf-role="more_world_news_listing_subitems"
            wf-new
            wf-allow=""
            wf-toolbar-position="left"
            class="u-grid u-grid-columns-2">
        </div>
    </div>
</div>
As you can see we have one button and one listing but we want to create the listing dynamically when we add a new button, to do this we can create a js file in: src/App/Bundle/CmsAdminBundle/Resources/public/javascripts/wfvue/store for ecample: src/App/Bundle/CmsAdminBundle/Resources/public/javascripts/wfvue/store/create_listing_tab.js now we have to include this in the index.js in the same folder src/App/Bundle/CmsAdminBundle/Resources/public/javascripts/wfvue/store/index.js
define(["_wfed/wfvue/store"], function (baseWfvueStore) {
    return (store) => {
        baseWfvueStore(store);
        require("admin/wfvue/store/create_listing_tabs")(store);
    };
});
now in our create_listing_tab.js:
define([
    "wfed/wfvue/store/util/constants",
    "wfed/wfvue/store/util/wf_role_path",
], function (
    { GETTER_MODULE_CONFIG, MODULE_ADD, MODULE_DELETE },
    { joinPath }
) {
    return (store) => {
        store.postAction(MODULE_ADD, ({ wfRolePath, contentModel }) => {
            const moduleConfig =
                store.getters[GETTER_MODULE_CONFIG](wfRolePath);

            if (
                !joinPath(wfRolePath).startsWith(
                    "world-more-content/world-more-subitem-title"
                ) &&
            ) {
                return;
            }
            var moduleNumber = joinPath(wfRolePath).match(/--\d+$/);
            if (moduleNumber !== null) {
                moduleNumber = moduleNumber[0];
            } else {
                moduleNumber = "";
            }
            store.dispatch(MODULE_ADD, {
                wfRolePath: [
                    "world-more-content",
                    "more_world_news_listing_subitems" + moduleNumber,
                ],
                role: "more_world_news_listing_subitems",
            });
        });

        store.postAction(MODULE_DELETE, ({ wfRolePath, contentModel }) => {
            const moduleConfig =
                store.getters[GETTER_MODULE_CONFIG](wfRolePath);
            if (
                !joinPath(wfRolePath).startsWith(
                    "world-more-content/world-more-subitem-title"
                )
            ) {
                return;
            }

            var moduleNumber = joinPath(wfRolePath).match(/--\d+$/);
            if (moduleNumber !== null) {
                moduleNumber = moduleNumber[0];
            } else {
                moduleNumber = "";
            }

            store.dispatch(MODULE_DELETE, {
                wfRolePath: [
                    "world-more-content",
                    "more_world_news_listing_subitems" + moduleNumber,
                ],
            });
        });
    };
});
Now let's see it step by step
- When a new module is added the store dispatch an event, we only want to listen for a especific one, in this case
world-more-subitem-titlethat is the children ofworld-more-contentas we can see on the twig template, so if the module is not what we want, we do nothing. If it matches our module lets see what position it has with a regular expresion that return '--N' of the module role, it's important because we want to dispatch MODULE_ADD event to create the listing module and this event need one object withWfRolePathandrole, in theWfRolePathwe have to declare the name of the new modulerole(this one have to have a consistency it's because we get the number of the button) and te role param is the role name of the module we want to make a copy.
store.postAction(MODULE_ADD, ({ wfRolePath, contentModel }) => {
            const moduleConfig =
                store.getters[GETTER_MODULE_CONFIG](wfRolePath);

            if (
                !joinPath(wfRolePath).startsWith(
                    "world-more-content/world-more-subitem-title"
                ) &&
            ) {
                return;
            }
            var moduleNumber = joinPath(wfRolePath).match(/--\d+$/);
            if (moduleNumber !== null) {
                moduleNumber = moduleNumber[0];
            } else {
                moduleNumber = "";
            }
            store.dispatch(MODULE_ADD, {
                wfRolePath: [
                    "world-more-content",
                    "more_world_news_listing_subitems" + moduleNumber,
                ],
                role: "more_world_news_listing_subitems",
            });
});- Code very similar to the one above but in this case the
MODULE_DELETEevent only requires that we send the name of the role that we want to delete, so when the button is deleted its list will be deleted
 store.postAction(MODULE_DELETE, ({ wfRolePath, contentModel }) => {
            const moduleConfig =
                store.getters[GETTER_MODULE_CONFIG](wfRolePath);
            if (
                !joinPath(wfRolePath).startsWith(
                    "world-more-content/world-more-subitem-title"
                )
            ) {
                return;
            }

            var moduleNumber = joinPath(wfRolePath).match(/--\d+$/);
            if (moduleNumber !== null) {
                moduleNumber = moduleNumber[0];
            } else {
                moduleNumber = "";
            }

            store.dispatch(MODULE_DELETE, {
                wfRolePath: [
                    "world-more-content",
                    "more_world_news_listing_subitems" + moduleNumber,
                ],
            });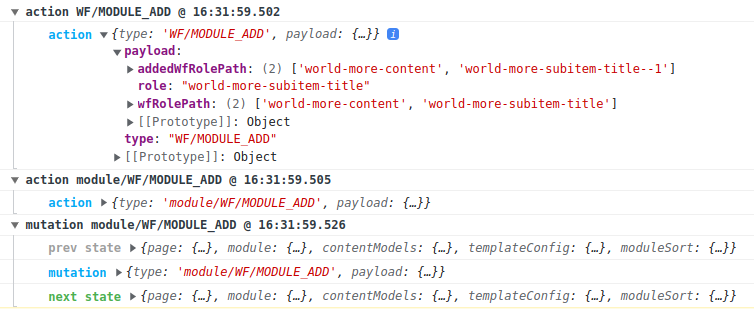
});Note: Is imporant to use the console logs on the development because this give us all the information about the events for example:
Using custom HTML elements
Trying to use a custom HTML element in our twig templates (e.g. Article/default.html.twig), where the content is being rendered by Vue, if we add this directly:
<vf-conversations :vf-container-id="currentPage.id"></vf-conversations>The render will throw the next error:
[WfCMS-renderer] [loencontraste/prueba-titulo-noticia-normal-poquito-219] [Vue warn]: Failed to resolve component: vf-conversations
If this is a native custom element, make sure to exclude it from component resolution via compilerOptions.isCustomElement.
To avoid this error, Vue allow us to use te <component/> tag, for example, to add comments with Viafoura we can add this html:
<component is="vf-conversations" :vf-container-id="currentPage.id"></component>Rendering currentPage tags
In wf-html templates, the tags assigned to the current page can be accessed in various ways, depending on whether they have a TagType (taxonomies) assigned or not.
currentPage.simpleTagsholds the array of all the tags that do not have anyTagTypecurrentPage.__TAXONOMY_SLUG__Tagsholds the array of all the tags that have the__TAXONOMY_SLUG__TagTypeassigned (e.g.currentPage.companyTagsfor all tags under thecompanytaxonomy)currentPage.pageTagshold the array of all the tags, no matter if they have aTagTypeassigned or not.
Once you know what tags array you want to display, you can use v-for to display them.
Example: Showing a list of all tags assigned to the current article - no matter if they have a taxonomy assigned or not:
<ul>
  <li v-for="tag in currentPage.pageTags">
    <a wf-href="tag">
      [[ tag.title ]]
    </a>
  </li>
</ul>